
RPNB Gun Safe Manual⁚ An Overview
This manual provides a comprehensive guide to operating your RPNB gun safe, covering everything from initial setup and access methods to maintenance and troubleshooting. It ensures secure firearm storage and quick access when needed, maximizing safety and peace of mind.
Understanding RPNB Gun Safe Models
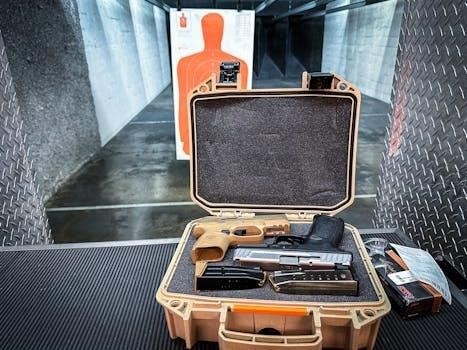
RPNB offers a diverse range of gun safes to meet various needs, including portable pistol safes, mounted gun safes, and large gun cabinets. Models like the RP2002 are designed for quick access using biometric fingerprint scanners, capable of storing up to 20 fingerprints. The RPFS series provides fire resistance, meeting UL 72 standards, and offers protection for up to 40 minutes at 1200 degrees Fahrenheit. Some models, such as the RP311F, feature auto-open lids and desk-mounted options for added convenience. Understanding the specific features of each model is crucial for optimal use and security. Ensure you consult the manual specific to your model.
Accessing Your RPNB Gun Safe
RPNB gun safes offer multiple access methods⁚ backup keys, digital keypads, and biometric fingerprint scanners. Each method ensures reliable entry, providing flexibility and security for authorized users.
Using the Backup Key
The backup key provides an alternative access method in case of battery failure or forgotten codes. To use it, locate the keyhole, often concealed by a cover. Insert the key and turn it, typically counterclockwise, to unlock the safe. Ensure the key is turned completely to disengage the locking mechanism. After opening, store the backup key in a secure location separate from the safe. This method is crucial when digital access is unavailable. Always test the backup key upon receiving the safe to confirm it functions correctly. Regularly check the key’s condition to ensure it remains effective. This is your fail-safe option.
Digital Keypad Operation
The digital keypad offers quick access using a programmable code. To open, enter your code, typically 3 to 8 digits long, followed by a confirmation key if required. If the code is entered incorrectly multiple times, the safe may enter lockout mode. The keypad may flash red during lockout. Refer to the manual for the default code if you haven’t set a new one. Program a unique code immediately after setup for enhanced security. Regularly test the keypad to ensure it functions correctly. Remember to keep your code confidential to prevent unauthorized access. Replace batteries promptly to avoid keypad malfunction.
Biometric Fingerprint Access
For rapid access, RPNB safes offer biometric fingerprint scanning. To use this feature, enroll your fingerprint following the manual’s instructions; some models can store up to 20 fingerprints. Ensure your finger is clean and dry for reliable scans. Place your finger flat on the scanner until the safe unlocks. If the scanner fails, try a different finger or use an alternative access method. Clean the scanner regularly to maintain accuracy. Register multiple fingerprints for convenience. If access becomes unreliable, re-register your fingerprints. Keep the scanner protected from damage. Refer to the manual for specific model enrollment procedures and troubleshooting tips.

RPNB Gun Safe⁚ Battery Installation and Replacement
Maintaining power is crucial. This section covers how to properly install or replace your RPNB gun safe batteries. Follow these steps to ensure your safe remains functional and your firearms stay secure.
Battery Installation Procedures
To begin, locate the battery compartment, often found inside the safe behind the keypad or near the door. Use your backup key to open the safe if necessary. Remove the battery compartment cover, usually by sliding it or using a small screwdriver. Note the correct polarity (+/-) as indicated inside the compartment. Insert the new batteries, ensuring they are correctly aligned. Replace the battery compartment cover securely. Test the keypad or fingerprint scanner to confirm proper function. If it doesn’t work, double-check the battery polarity and ensure the batteries are fresh. Always use high-quality batteries for optimal performance and longevity. Proper installation guarantees reliable access.
Low Battery Warnings
RPNB gun safes are equipped with low battery warning systems to ensure uninterrupted operation. These warnings typically manifest as a flashing light on the keypad or a series of beeps during operation. Some models may display a “low battery” message on the digital screen. Upon receiving a low battery warning, it’s crucial to replace the batteries promptly to avoid being locked out. Ignoring these warnings can lead to the safe becoming inoperable, requiring the use of the backup key. Regularly check the battery status to maintain consistent performance. Timely battery replacement prevents unexpected access issues and ensures continued security for your firearms.
RPNB Gun Safe⁚ Programming and Resetting Codes
This section explains how to program a new user code and reset the code to its default setting. Following these instructions will ensure that your safe remains secure and accessible.
Setting a New User Code
To set a new user code on your RPNB gun safe, begin by opening the safe using the existing code or backup key. Locate the programming button, often found on the inside of the safe door. Press this button to enter programming mode; an indicator light will usually illuminate. Enter your desired new code, which should be between 3 to 8 digits long, using the keypad.
After entering the new code, press the programming button again to save the changes. The indicator light should confirm that the new code has been successfully set. Test the new code to ensure it works correctly before closing the safe.
Resetting the Code to Default
If you forget your user code, resetting your RPNB gun safe to the default code is essential. First, locate the reset button, usually inside the safe near the battery compartment. Use the backup key to open the safe. Press and hold the reset button for a few seconds until the indicator light flashes. The safe should now be reset to the factory default code, often “1-2-3-4.”
Immediately after resetting, program a new, unique user code to maintain security. Follow the instructions for setting a new user code to ensure the safe remains protected. Always test the new code before relying on it.
RPNB Gun Safe⁚ Safety Features and Lockout Mode
RPNB gun safes prioritize security with features like lockout mode after multiple incorrect entries. Fire resistance, sturdy steel construction, and biometric options further enhance protection for firearms and valuables.
Understanding Lockout Mode
RPNB gun safes incorporate a lockout mode as a critical security feature. If an incorrect code or fingerprint is entered several consecutive times (typically five attempts), the safe will enter a temporary lockdown period. During this time, the keypad will be temporarily disabled, preventing further access attempts. The buttons may flash red to indicate the lockout status.
This lockout period is designed to deter unauthorized access by preventing someone from repeatedly guessing the code or attempting different fingerprints. Although the digital keypad is disabled, the safe can still be opened using the backup key override system, ensuring access for authorized users even during lockout mode. This feature adds an extra layer of security and protects against potential breaches.
Fire Resistance in RPNB Safes
Select RPNB gun safes are engineered with fire-resistant materials to protect your firearms and valuables in the event of a fire. Some models, like the RPNB RPFS24-B, feature thick, heat-resistant fireboards that provide exceptional fire protection; These safes are often tested to meet UL 72 standards, offering a specified duration of protection at a certain temperature.
For example, some safes provide up to 40 minutes of protection at 1200 degrees Fahrenheit. This fire resistance is crucial for safeguarding contents from heat damage, giving you valuable time for fire response. Always refer to the specific model’s documentation for detailed fire resistance ratings and information. This feature enhances the overall security and protection offered by RPNB gun safes.
RPNB Gun Safe⁚ Mounting and Placement
Proper mounting and placement are crucial for RPNB gun safe security. Options include desk-mounted and portable solutions. Secure mounting prevents unauthorized removal, while strategic placement ensures quick access.
Desk Mounted Options
RPNB gun safes offer desk-mounted options for secure and accessible firearm storage. These models, like the RP311F, are designed for quick access while remaining discreet. Mounting to a desk or similar surface enhances security by preventing theft. Follow the included instruction manual, often found online, for proper installation using the provided expansion bolts.
The RP311F model features an auto-open lid and biometric fingerprint lock for rapid entry. Ensure the safe is firmly attached to prevent movement or tampering. A printable template may be available to assess fit before installation. Desk mounting provides a balance of security and immediate access.
Portable Gun Safe Usage
RPNB offers portable gun safes designed for secure firearm transport and storage on the go. Models like the PC-95C-2 provide keyed or combination lock options for reliable protection. These safes are compact and lightweight, making them ideal for travel. Always adhere to local laws regarding firearm transportation.
Battery installation, often accessed via a key-operated compartment, is crucial for digital models. Ensure batteries are fresh to avoid lockouts. The included instruction manual provides detailed steps for battery replacement and operation. Portable safes offer convenience and peace of mind, ensuring responsible firearm handling wherever you are.
RPNB Gun Safe⁚ Troubleshooting Common Issues
Encountering issues with your RPNB gun safe? Start by checking the batteries; low power can cause keypad malfunctions or biometric scanner failure. If the keypad is unresponsive, try the backup key. For fingerprint scanner problems, ensure your finger is clean and dry. If the safe enters lockout mode after multiple incorrect attempts, wait the specified time before trying again.
Refer to the instruction manual for specific error codes and solutions. If problems persist, contact RPNB support. Never store backup keys inside the safe, as this defeats their purpose during emergencies.
RPNB Gun Safe⁚ Warranty and Support
RPNB provides a warranty for their gun safes, covering defects in materials and workmanship. The duration and specific terms can be found in the warranty documentation included with your safe or on their website. To claim warranty service, you typically need proof of purchase and a detailed description of the issue.
For technical support or assistance with troubleshooting, RPNB offers customer service via phone, email, or their online support portal. Refer to the manual for contact information. Be prepared to provide your safe’s model number and a clear explanation of the problem.
RPNB Gun Safe⁚ Manual Downloads and Resources
To access the most up-to-date version of your RPNB gun safe manual, visit the official RPNB website. Look for the “Support” or “Downloads” section, where you can find PDF versions of manuals specific to your safe’s model number. These manuals often include detailed instructions, diagrams, and troubleshooting tips.
In addition to the manual, RPNB may offer other resources such as FAQs, video tutorials, and customer forums. These resources can provide further assistance with setup, programming, and resolving common issues. Always refer to official RPNB resources for accurate information.